What This Does #
Gathers customer information like names, emails, and contact details during conversations.
When to Use This #
- You need contact information for follow-up
- You want to qualify leads for sales
- You’re providing personalized support
- You need customer details for service delivery
Step by Step Instructions #
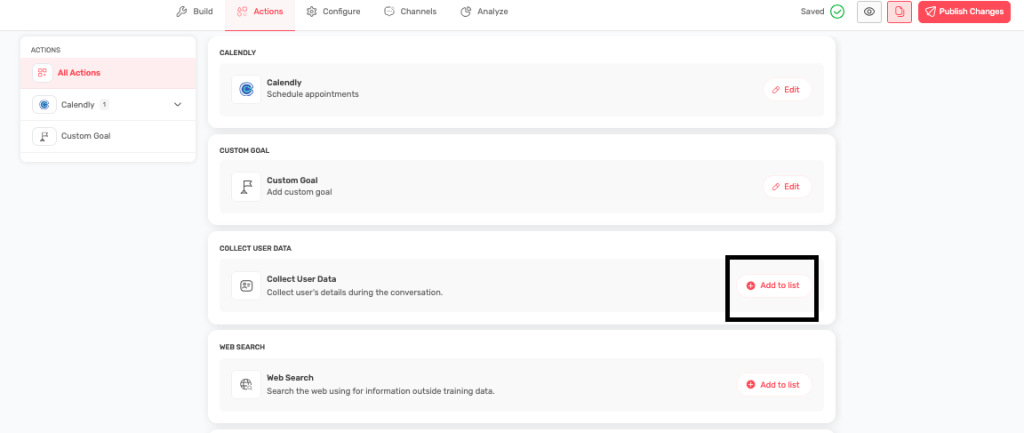
- Enable Data Collection
- Navigate to Actions
- Find “COLLECT USER DATA” section
- Click “Add to list” to enable
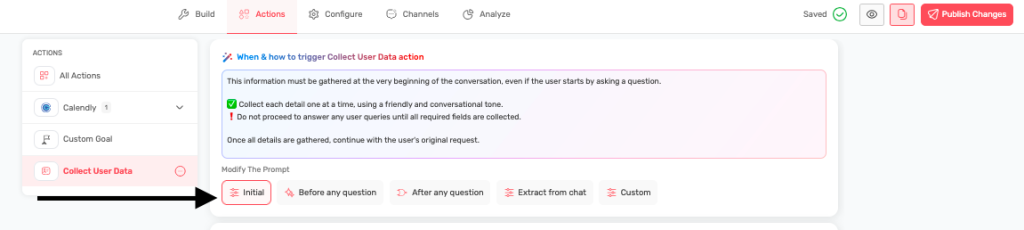
- Choose When to Collect Data
- Initial: Ask for info at the start of conversation
- Before any question: Collect before user asks anything
- After any question: Natural flow after understanding needs
- Extract from chat: Automatically pick up mentioned information
- Custom: Define your own conditions
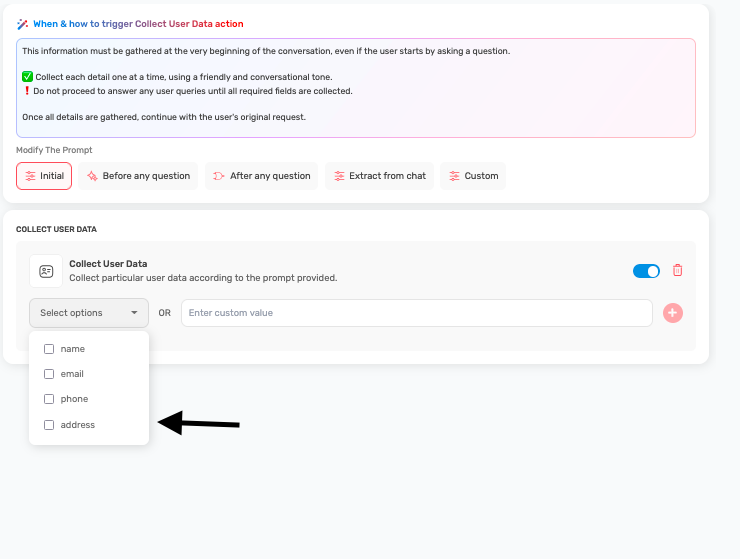
- Select Information to Collect
- Standard fields: Name, email, phone, address
- Custom fields: Add your own relevant information
- Choose required vs. optional fields
- Configure Collection Strategy
- Set up friendly, conversational data collection
- Don’t proceed with other tasks until required fields are collected
- Gather information one piece at a time
When to Use Each Collection Method #
Initial Collection:
- Use for: Contact forms, user identification
- Example: “Hi! To provide personalized help, could you share your name and email?”
Before Any Question:
- Use for: Support tickets, account verification
- Example: “Before I help, I’ll need a few details to access your account.”
After Any Question:
- Use for: Lead qualification, follow-up information
- Example: “I can help with that! To provide the best solution, what’s your company size?”
Extract from Chat:
- Use for: Natural conversations, reducing friction
- Automatically captures when users mention: “I’m John from ABC Corp”
Information Collection Best Practices #
Be Strategic:
<aside>
Collect information progressively:
- Start with most important fields (name, email)
- Add business context (company, role)
- Gather specific needs (budget, timeline)
- Explain why you need each piece of information </aside>
Use Natural Language:
<aside>
Instead of: “Enter your email address” Say: “What’s the best email to send you the information?”
Instead of: “Company name required” Say: “What company are you with?”
</aside>
Example Collection Flows #
Lead Qualification:
<aside>
Bot: “I’d love to help you find the right solution. What’s your name?” User: “Sarah” Bot: “Nice to meet you, Sarah! What company are you with?” User: “TechCorp” Bot: “Great! What’s the best email to send you information about our solutions?”
</aside>
Customer Support:
<aside>
Bot: “I’m here to help with your issue. To provide the best assistance, what’s your name?” User: “Mike Johnson” Bot: “Thanks Mike! What email address is associated with your account?”
</aside>
Data Fields to Consider #
Basic Contact:
- Full name
- Email address
- Phone number
- Company name
Business Context:
- Job title/role
- Company size
- Industry
- Location
Sales Qualification:
- Budget range
- Timeline for decision
- Current solution
- Decision-making authority
Support Context:
- Account ID
- Product/service using
- Issue category
- Urgency level
Privacy and Compliance #
- Always explain why you’re collecting information
- Get consent before collecting personal data
- Offer value in exchange for information
- Make it clear how the information will be used
- Provide options to opt out or update information
Tips for Success #
- Collect information conversationally, not like a form
- Explain the benefit: “This helps me give you better recommendations”
- Don’t ask for too much at once
- Make required fields clear
- Test the flow to ensure it feels natural
- Use the information you collect to personalize the conversation